Happy New Year? Remembering Y2K in the Museum Collections
While we look upon most new years with great anticipation and excitement for the possibilities of what the upcoming 12 months will bring, the preparations for the turn of the millennium brought fear and trepidation along with hope. Faced with the prospect of calamitous computer problems posed by the Y2K bug, people prepared to shelter in place or alternately to “party like it's 1999.”
Some artifacts in the museum collections show the variety of activities and emotions associated with the coming of the new millennium.
The specter of Y2K brought worries that computers in financial institutions such as banks wouldn’t be able to handle changing internal computer calendars from 1999 to 2000. Since many programs represented years by their final two digits, the concern was that systems, unable to differentiate 2000 from 1900, would crash and all the money in our accounts would be lost. This led some people to withdraw all their money from the bank with the plan of depositing it all back in early January. To prevent a run, bankers tried to quiet these fears by assuring their customers that their money was safe.
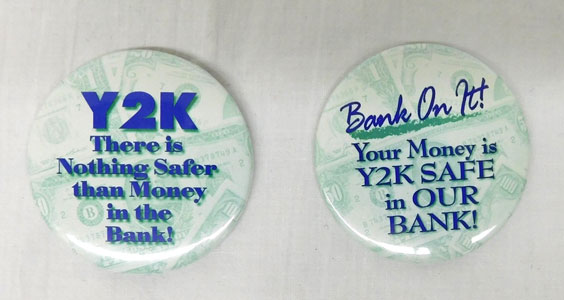
SHSND 2002.120.1-2
The U.S. government also did its part to assure people that Y2K wasn’t Armageddon in the pamphlet “Y2K & You: a new horizon” published by the Federal Emergency Management Agency. This pamphlet contained information on a variety of topics such as “The History of the Y2K ‘Millennium Bug’” and “What Are State Governments Doing,” aimed at calming a jittery public.
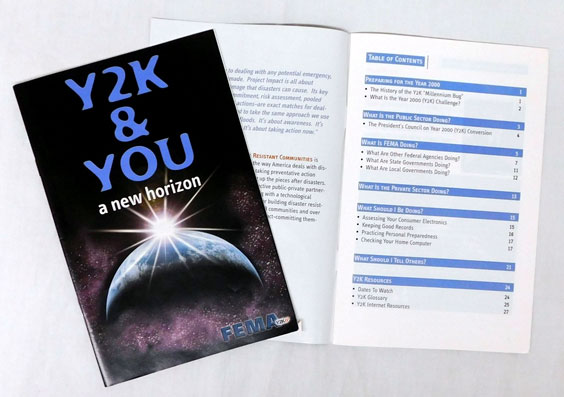
SHSND 2007.33.1-2
Churches also did their best to help bring hope for peace with the new millennium. Faith Lutheran Church in Bismarck included a notice on the back cover of its Christmas program inviting the congregation to attend a vigil on December 31, 1999, at 11:30 p.m., with a candlelight walk through the neighborhood at midnight.
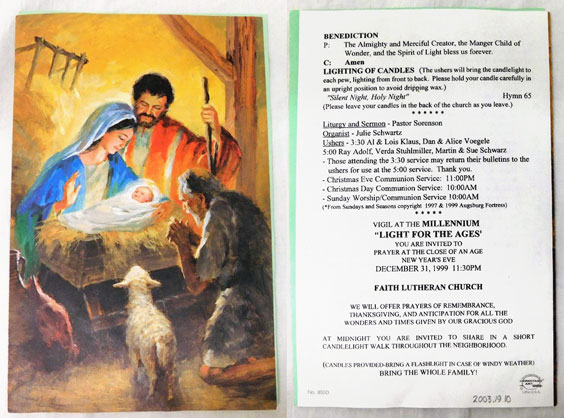
SHSND 2003.19.10
For those who were “gonna party like it’s 1999,” there were lots of fun items to help with the celebrations. Along with the traditional party hats, noisemakers, and napkins, one could pick up a pair of 2000-shaped novelty eyeglasses or some confetti to toss at midnight. And for the big toast, a bottle of sparkling wine and a “Happy 2000” balloon could help you ring in the new year in style.
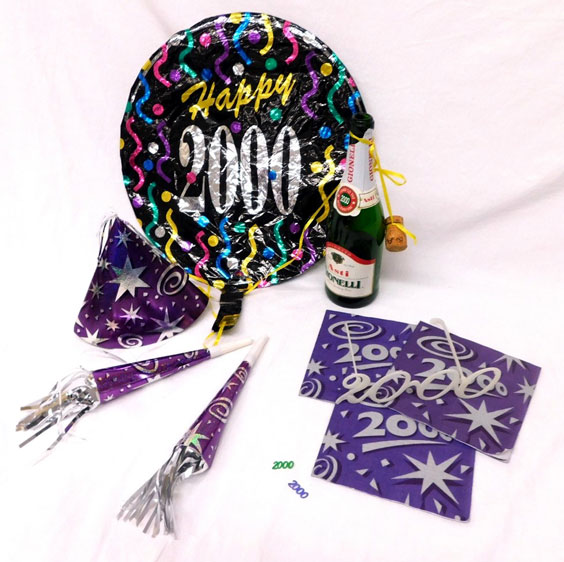
Celebratory accoutrements for the new millennium. SHSND 2003.19.1-9, 2004.5.9
There were also everyday items made a little extra special for the new year. M&M’s made special edition “Millennium Party Boxes” with its famous candies in confetti colors. (Though to be honest, aren’t they already in confetti colors?) It looks like brown was replaced by purple. Inside each box was a fun New Year’s resolution that the different M&M characters made. I particularly like Yellow’s resolution “to stay away from people who only love me for my shell. It’s what’s inside that counts, right?” No one can argue with that!
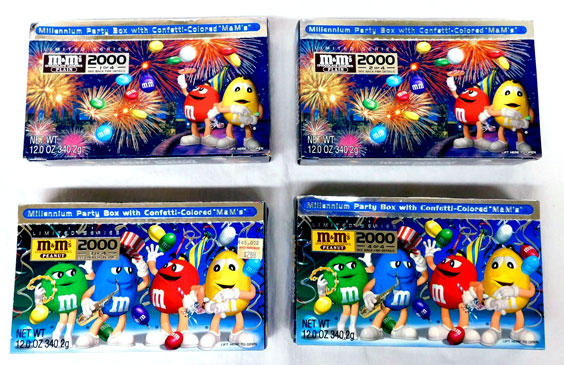
SHSND 2004.5.5-8
Not only was 2000 the start of a new millennium, it was also the start of a new century. Calendars were made to remember the previous century while this child’s calendar helped to document the firsts of the new century.

SHSND 2004.5.3-4
Looking back at that time we can see the fears were largely unfounded, and for most of us 2000 was just another reason to celebrate and be able to say we lived in two centuries and two millenniums! So here is wishing you all a very happy new year in 2024.